Showing posts with label design. Show all posts

Thursday, April 8, 2010

Jewerly Organizing--made easy!

I had been complaining to my husband forever that I needed a full length mirror! It was driving him nuts! One night I was looking at http://www.overstock.com, which is a site that I love, and found the perfect mirror! Plus it stores all my jewerly, which freed up so much space on my dresser and put everything in one place! For $119.99 and $2.95 shipping, it was mine!

Here is the link to the item I bought on http://www.overstock.com/:

http://www.overstock.com/Home-Garden/Silver-Finish-Jewelry-Armoire-Mirror/4118750/product.html

Here is the inside of the unit (bottom half in the pic, top half has a mirror inside), with ample room for necklaces, rings, bracelets, and watches.

Looking at the inside of the unit with the door open. The door has tons of room for earrings and more necklaces!

With nothing in it!

The mirror with the door shut. It has a magnet that holds the door shut.
This mirror/jewerly armoire was the perfect solution to my unorganized jewerly problem. Before I had to search for the piece of jewerly I wanted, and being a mom, time is crucial. Having everything at my fingertips is very important! Plus, I have my full length mirror that serves a very functional role!


Dresser Drawer Overhaul

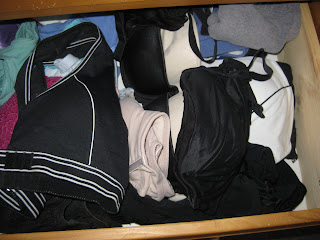
I recently did a dresser drawer overhaul in our master bedroom. From start to finish (6 drawers), it took about 1 1/2 hours. I have before and after photos for you to see. I was frustrated with not being able to find what I wanted in our drawers. Moreover, my 15 month old son was having too much fun taking everything out of the drawers, which made my attempts at keeping the drawers neat worse.

Here are some before pics:

Sock Drawer (also contained tights, hose, slips, etc.)

Panty drawer, all types mixed up


Other side of pantry drawer, again all types mixed up

bra drawer, messy

other side of bra drawer, couldn't find straps to special occasion bras
In the dresser four drawers were for me, and two drawers for my husband. My drawers consisted of underclothing, socks, hose/tights, and bathing suits. My husband's drawers had socks and underwear in them.
These are the steps I took to organize the drawers.
  1. Completely empty a drawer, one at a time.
  2. Vacuum out the drawer with the hose of the vacuum.
  3. Go through each item creating a donate pile, trash pile, and keep pile.
  4. Items that were in the kept pile were then folded neatly and stacked into "like" piles (i.e. exercise bras, cotton panties, thongs, special panties/bras, maternity bras, nursing tanks, strapless bras, etc.).
  5. Place neatly stacked piles back into the drawer. Place less-used items in the back of the drawer and more-used items in the front of the drawer. *Use drawer separaters if you choose (more on that below).
  • I took out all my maternity bras and nursing tanks out of the drawers and put them into a large storage container to be stored in the basement. They were taking up precious space!
  • I moved my sports bras and slips to the closet.
  • Some of my special occasion bras have straps, so I put them into a zip-top bag so that I could find the straps when needed.
  • Socks were inspected for holes, loss of elasticity, etc. and tossed into the trash.
  • Pantyhose, tights, and thigh highs were inspected for holes and runs. The keepers were then put into individual zip-top bags to prevent snagging.

*Drawer dividers are a great way to keep piles in piles and looking neat. I researched several sites to order some of these. Unfortunately, I didn't find what I was looking for and need to go to a organizing store in a larger city to find what I am looking for. I tried to use sturdy pieces of cardboard (which you will see in some of the photos), but then didn't like these because they made my clothes smell like cardboard...not pleasant!*

After pics of the drawers:
half of my husband's underwear drawer


my sock drawer, each pair folded into each other, color cordinated, single layer

panty drawer, neat stacks in similar types


half of bra drawer, right side is special occasion bras (i.e. strapless, convertible, bustier)


other half of bra drawer, bras folded into cups, colour-cordinated
There are two drawers not pictures, my husband's sock drawer and my bathing suit drawer. I hope this gives you some ideas on how to organize your drawers and underclothing! If you have additional ideas, please feel free to post a comment. I can find anything now quickly and efficiently and save precious minutes in the morning getting ready!


Tuesday, February 23, 2010

Master Bedroom Closet Makeover--Part 2

After MUCH research of different closet systems, my husband and I decided to put a hold on this closet remodel project. It is very expensive and we weren't sure what exactly we wanted. We will attempt to do this again come this winter. So now I organized the closet with what items we have on hand now. I bought nothing new.


These are the steps I have taken so far:


Organizing a closet this size with this much in it, was going to be a multi-step project. The first step was to take before pics and make a plan. After the before pictures were taken, my next step was to go through each item, getting rid of clothes and shoes that my husband and I no longer wear. I made three piles: sell, donate, and throw away. For me, this took about 1-2 hours.


Next I started with the top shelf. I reorganized my husband's sweaters, sweatshirts, and t-shirts. I made two folded stacks of sweaters, two folded stacks of sweaters, and several stacks of like-color t-shirts. I labeled each stack by sticking a label below on the shelf marking what the pile had in it. This was mainly so my husband could keep things organized as well. He has about 3/4 of the top shelf for his items. The other 1/4 of the top shelf has my sweaters and t-shirts. I have my sweaters folded in stacks of hooded sweaters, turtlenecks, warmer sweaters, light sweaters, etc. I have my stacks labeled as well the same as my husband's (see pictures). For the summer my sweaters are the top shelf, and in winter I put them where my shorts and summer bottoms are kept.
After the entire top wrap around shelf was neat and organized, I went to the shelves in our closet. The top shelf had my husband's jeans and khakis on them. I decided to hang my husband's pants and khakis because he would make a mess of the stacks finding the pair he wanted. I used that top shelf now for my husband's work clothes (pants and t-shirts), again labeled.
The next two shelves had my sweaters on them. Now they have been moved for the summer to the wrap around shelf in the closet. The one shelf has my work-out shorts, capris, and long pants on them, labeled. The next shelf down has my shorts and summer cardigans, labeled. The bottom shelf has my jeans and capri jeans on it. I have not organized this shelf yet, and it will be talked about in part three of the closet makeover.

I also used my husband's tie hanger for my scarves. My husband no longer has a job that requires him to wear ties, and MANY were outdated. The ones that we kept, I hung on a regular hanger. The belts that we kept are hung on a regular hanger, one for my husband's belts and two for mine.

Wrap-around shelf, (left to right) my husband's t-shirts color-coordinated, my t-shirts, my sweaters. Please note that each stack is labeled.

More detailed picture of my sweaters and labels.

My hanger with scarves on it, top shelf with work-out clothes and next shelf with shorts and cardigans on it.

Top shelf, my husband's work pants, t-shirts, and caps. Next shelf my work-out shorts, capris, leggings, and long pants.

Wrap-around shelf, my husband's sweatshirts, lounge pants, sweaters, and sweatshirts. Please note labels. Also, hanging are my husband's khakis and jeans.
*************************************************************************

What I have done so far took me approximately 3-4 hours. Please see pictures above for details on my progress. I am now working on the rest of things, which will probably take me two more posts to finish.
By tackling small sections, it helped me to not get over-whelmed by the amount of work it is taking to overhaul our closet. Moreover, you can start and stop more easily and work on this project over several weeks, if needed.
If you feel yourself getting overwhelmed, TAKE A BREAK!!!
When you have finished your closet project, you will be much less stressed and feel better that you are organized and can find things easily!


Thursday, January 28, 2010

Walk-In Closet Makeover--Part 1


As an organizer, I am embarrassed to say that the walk-in closet in our master bedroom has literally become a disaster! I have been wanting to install a custom walk-in closet system since we moved into our house. So for months now, I have been procrastinating and in the process of my procrastination, I have let our closet become the mess that it is! As for most of the "stuff" on the floor, it is due to my one-year-old son taking all the folded clothes off the shelves and playing with them!

There are SO many options out there for closet system makeovers from a few hundred dollars to several thousand dollars! I want something high quality, but I want a great deal! This makes a perfect winter project for me to complete! It has come to the point that I "just have to make a decision" and stick with it!